VMware Restore
Restore VMware
Restore the virtual machines from the IDrive account to your VMware environment in a fast, secure, and reliable way.
- Click 'Restore'.
- Select 'Online Restore', or 'Local Restore', or 'IDrive Express™ Restore'.
- Locate and select the 'IDVMwareBackup' folder in your IDrive® account or local drive.
Note: If 'Local Restore' is selected, you can choose the required version from the 'Version' list.
- Click 'Restore Now' to restore the 'IDVMwareBackup' folder to the local computer.
- After the 'IDVMwareBackup' folder has been successfully restored to the local computer, go to 'Server Backup'. A slider menu will appear.
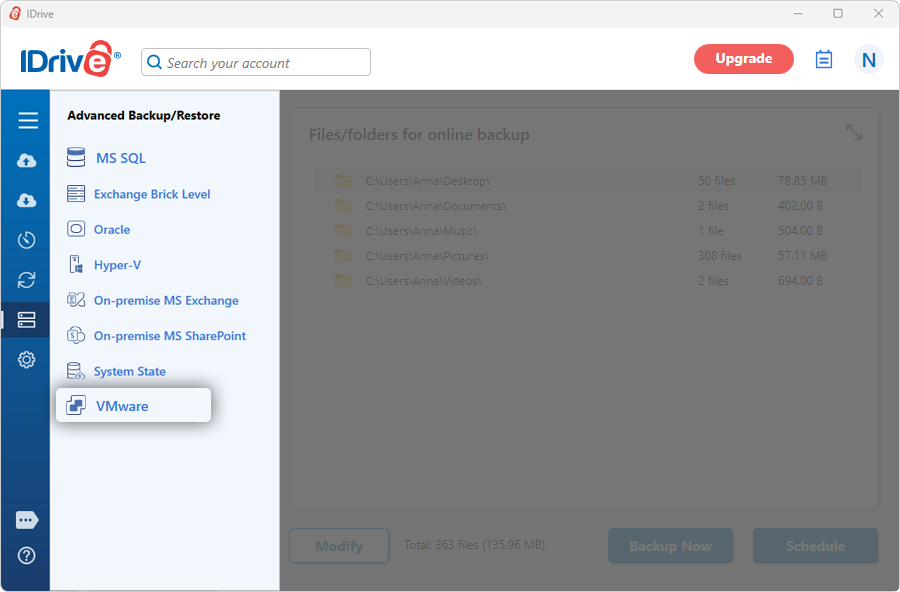
- Click 'VMware'. The VMware connection screen appears.
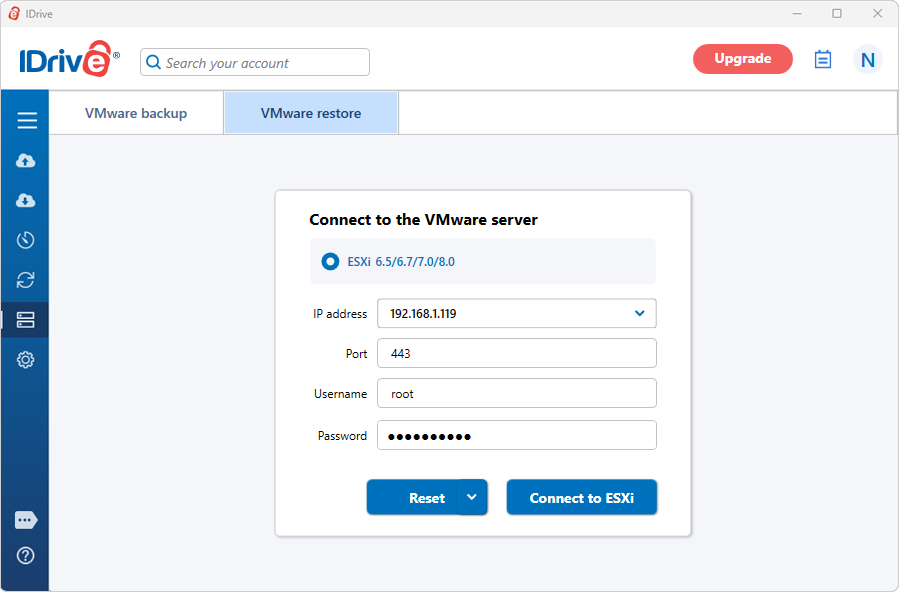
- Click 'VMware restore'.
- Enter the IP address, Port, Username, Password, and click 'Connect to ESXi'.
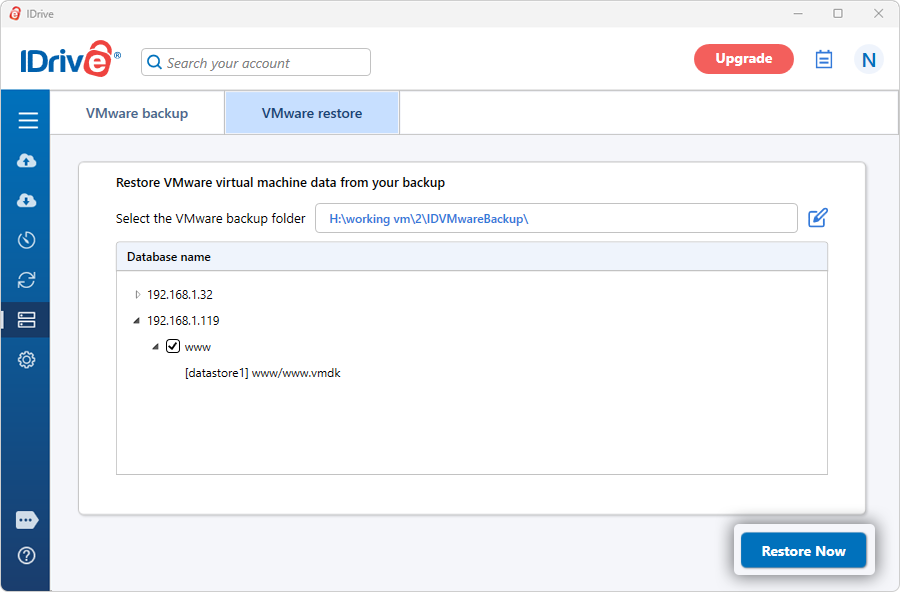
- Browse and select the 'IDVMwareBackup' folder (restored earlier from your IDrive account or local drive).
- Select the virtual machine(s) you want to restore to your VMware server.
- Click 'Restore Now'.
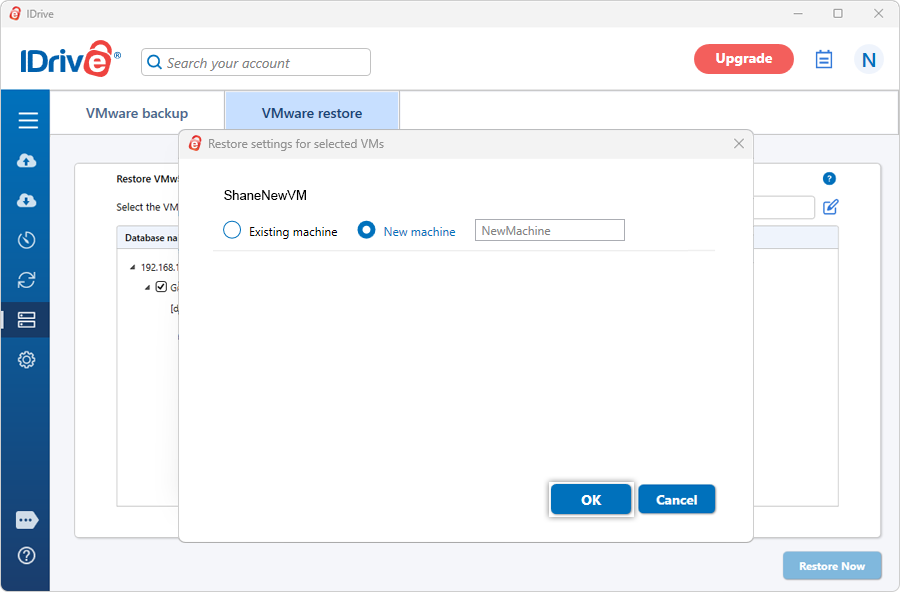
The restore settings popup will appear. - By default, the ‘Existing machine’ is selected as the restore location. To create a new virtual machine in the same location with the selected data, choose ‘New machine’ and enter a name for the virtual machine.
- Click ‘OK’ to proceed.
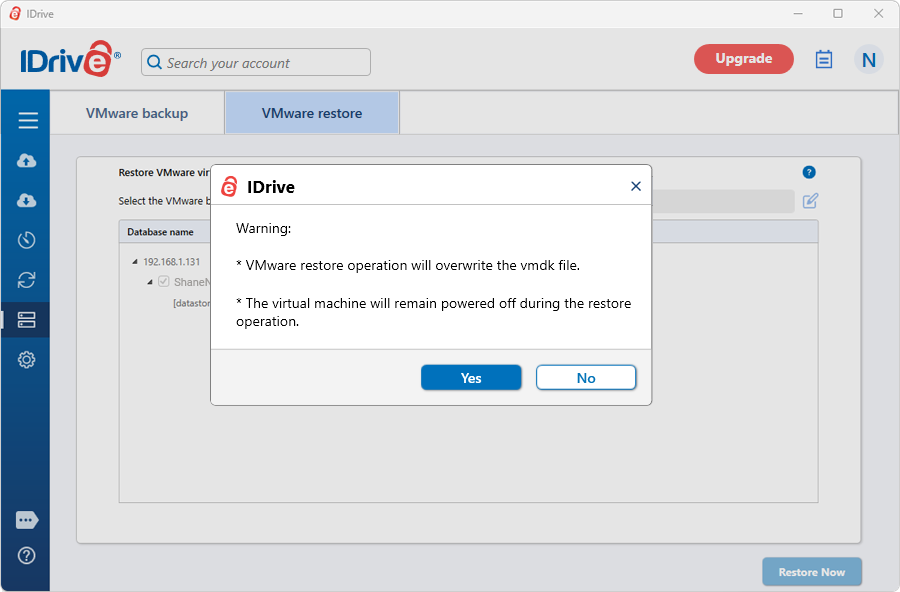
- A confirmation popup will appear informing that the VMDK file will be overwritten and the virtual machine will remain powered off during the restore operation. Click 'Yes' to proceed.
On successful completion, a restore summary will be displayed.
View the steps to backup VMWare.